iDS6 Server Software User Manual VersionüF5.5 Date UpdatedüF2015.4.17
![]()

Contents
1 Server Software Installation3
4.1 Standalone Export Software19
5.1 Hardware Terminal Offline19
5.3 Flag Plug in Program Installation. 19
1 Server Software Installation
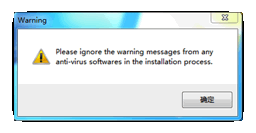
Note One: Please uninstall old version iDS6 software in
advance. If user installs Tomcat and MySql and other software, please uninstall
that software to avoid failed installation. It is recommended that close related
anti-virus program
Note Two: If iDS6 Software
has been installed, please click Start->All Program->IDSV6->Uninstall
iDS6 Software Running Environment
can support Windows XP, Windows 7, Windows Server 2003, Windows Server 2008 and
etc. The installation files name is similar as ügiDS6_Win64_En_V5.5_20150121.exeüh
and then Double Click to directly enter installation progress.
Pic 1.1
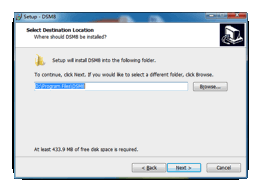
During installation, in order to avoid errors, Installation path should not appear Chinese or special characters. It is recommended that install software into root directory of hard disk and default is in D:ĆProgram Files. If there is no D Hard Disk, please choose another one hard disk of root directory by yourself.
Pic 1.2
Pic 1.3
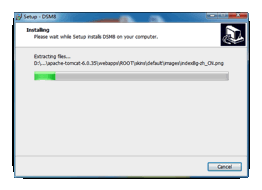
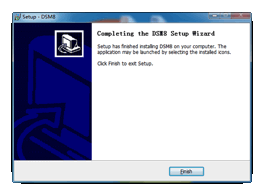
Then wait for several minutes, installation is
finished.
Pic 1.4
Open Start->All Program->IDSV6->Setup iDS6 , make sure the services are working.
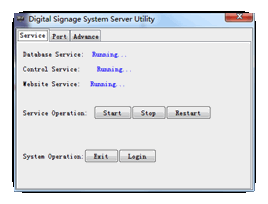
Pic 1.5
Or open the Task Manager->service, you can see three DSM service.
Then, Please click short cut on desktop ügLogin iDS6üh to check Server Software is running well or not as bellow:
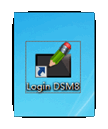
Pic 1.6
If service cannot run well, please contact with our IT engineers.
2 Software Introductions
Login Page:
iDS6 Software is web-based. Not only user can click ügLogin iDS6üh on desktop, also open iDS6 software by inputting IP address through browser.
Q: If I install software into A computer, can I manage it though B
computer?
A: No problem at all. Just need input IP address of A computer in B computer.
Default Login Info:
Username: admin Password: admin Corp ID: demoiDS6 Software Interface as bellow:
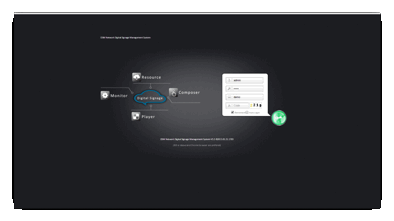
Pic 2.1
Server software includes Resources, Composer, Player, Monitor, Account, Statistics and etc. Normal operation process is that Upload Resources, Make Composer, Register Player, Set Playlist and Check Statues. Advanced setting includes Remote Monitor, Upgrade Player, and Analyze Problems, Player Report, Check Screenshot, Account Role, Record Statistics and etc.
2.1 Homepage
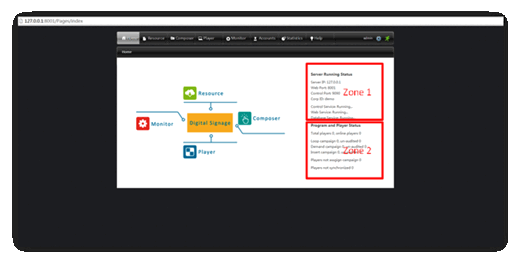
Pic 2.2
Zone 1: Server Software Info
Server IP: For it is local machine, so IP address shows 127.0.0.1. If user uses another computer to visit iDS6 software, then IP address is of server software.
Website Port: Default HTTP Port is
80. User can change it through ügSetup iDS6üh.
Note: If Website Port is changed from 80 into
8080, then server software address is IP address: 8080.
Control Port: Get communication
between Server and Player.
Corp ID: Administrative domain after login iDS6 Software.
The following Control Services, Web Services and Database Services need to be shown ügrunningüh.
Zone 2: It records connection of iDS6 Interface and Players Statues. User can check playlists statues of players through here.
2.2 Resources
Zone 1 Zone 3
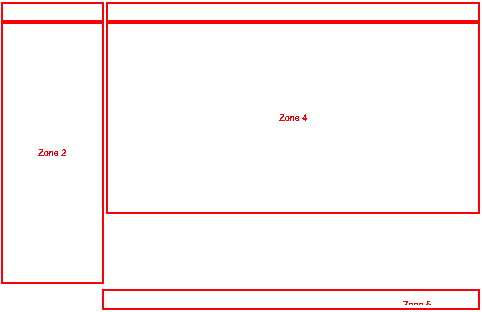
Pic 2.3
Zone 1: Resources mainly includes File, RSS and Template. File includes Video, Image and etc.
Hereby, some RSS materials are offered and user can also create own RSS resources.
Template is for saving playlist templates which already have done. We also offer some templates for your reference.
Method of RSS and Template is almost similar. Hereby, it mainly introduces File as bellow:
Zone 2: User can set up various levels of file folders to make resources organized.
Zone 3: It is faster to locate resources which you would like through screening method.
Zone 4: Resources Show Zone and click Zone 2, Zone 4 will show them out.
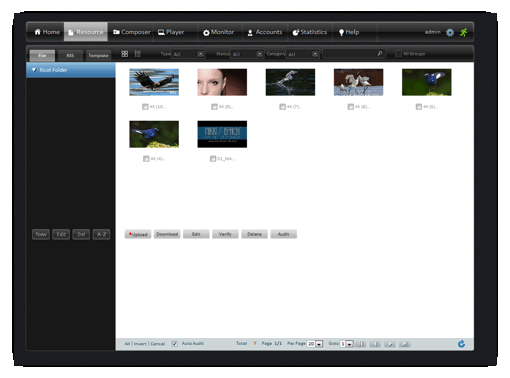
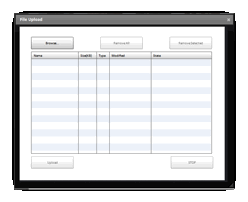
Upload :upload resources from local computer.
Note: Click ügUpload
ügand appear Flash Upload Interface (there is installation
suggestion if native machine does not install Flash programs). Or drag one file
or multiple ones to upload. User also can click ügBrowserühto search files in
computer.
ügDownloadüh is used for saving uniformed files into assigned root directory to back up or check. Click üg Direct Preview üg in file list or Thumbnails to preview files.
Pic 2.4
ügEditüh is used for modifying related info as bellow:
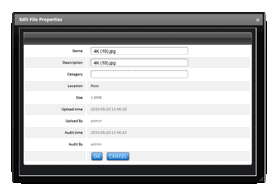
Pic 2.5
ügVerifyüh is used for checking files abnormal. For example, if database or physical files occurs binary errors, or broken or deleted, and then verification is failed.
ügAuditüh is used for auditing resources. Only files which are audited and then they can be used for composer.
Notice: In Zone 5, please choose ügAuto Auditüh. If
user does not choose it, resources need to be audited after uploading.
Zone 5: File list can be flexibly checked according to every page 10 /20/50. Or directly jump into certain page according to specific page number. Also user can click shortcut to enter into Home, Page-end, Last, Next and etc. Please take notice on ügAuto Auditüh and user need check it out.
2.3 Composer
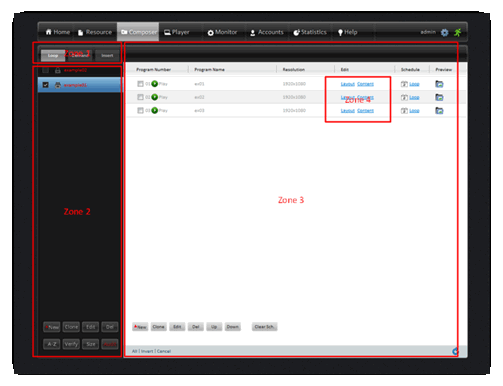
Pic 2.6
Zone 1: Composer included Loop, Demand and Insert.
Loop Composer: It is most widely-used for player. Player displays every loop composer in circle and it comes with introduction in details as bellow.
Demand Composer: Same as Loop Composer. Difference is that Demand Composer is not directly displayed for player. It needs to be triggered by remote control, inductor or network command.
Insert Composer: According to Start Time/End Time & Display Times/Display Method, it finishes emergent news delivery.
2.3.1 Loop Composer
New: Click ügNewüh to set one new composer and name it.
Pic 2.7
Clone: Click ügClone ügto back
up another copy. User can modify it for one certain composer.
Edit: Modify name of Composer.
Delete: Delete composer that selected.
A-Z: Arrangement Mode of Composer
Verify: Check Resources are complete or not.
Size: Related info of Composer.
Audit: Any modification for composer need to be audited again and then uploaded to player. It is red if composer is not audited. So please do not forget audit composer once edit composer.
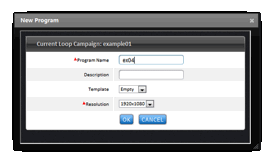
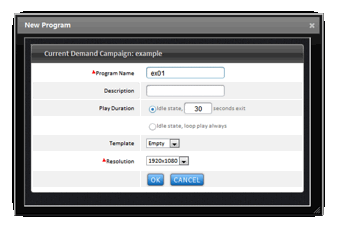
Zone 3: User can create multiple programs, such as test 01. Display order is Top-down and when program statue is pause, it is missed displaying.
New: Click ügNewüh to set up one program and user can choose Template and Resolution.
Notice: Resolution is chosen according to terminal
resolution. Or it brings troubles for displaying programs.
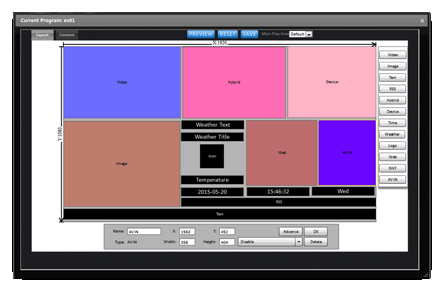
Zone 4: Hereby, user can edit and set layout & content for assigned program.
Pic 2.8
Like above image shows, user can add kinds of programs into layout. Each zone is adjusted by mouse cursers. Or directly input specific numbers in X and Y to adjust location coordinate.
ügHybridüh: User can add kinds of resources into Hybrid Area. For example,
user adds videos and images into Hybrid Area and then after player finishes
displaying video and images are displayed.
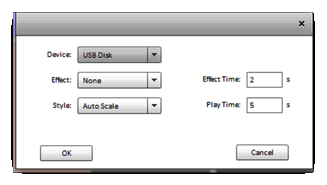
ügDeviceüh: Device area can display playlists of USB flash driver. Click Advance and user can check it as bellow pic2.9:
Pic 2.9
Choose U Flash driver, then player displays content from U flash driver. User needs copy images into U flash driver in advance. Playback order is same as marshalling sequence of images. So user needs edit images properties and obtains desired playback effect.
ügAdvanceüh: Hereby, user can modify Color, Font, and Background of Text File.
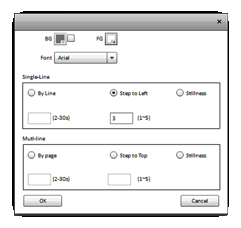
Pic 2.10
ügRight Click ügin layout, user can set ratio and use back ground image to intuitively design layout.
After finish Layout and then click ügSave üh, go to üg Content üg and add resources into related areas.
Pic 2.11
Hereby, click ügEditüh and user can edit related resources.
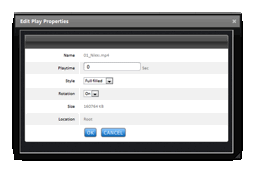
Pic 2.12
Notice: Playback time is set as 0 which means fully display for one time.
2.3.2 Demand Composer
Demand composer is triggered through pressing numbers on remote control; touch screen, mouse or network command. Click ügDemand üg and then click ügNewüg to set up new demand composer. Main difference between Loop Composer and Demand Composer is that user need set playback method (times/playback time). If user sets Demand Composer according to times, then player displays it for assigned times. If user sets Demand Composer according to playback time, then player displays it for assigned playback time.
One Demand Composer allows up to 99 programs. Playback order can be adjusted through Up & Down. Program number is No 1 for first row and by this analogy.
Pic 2.13
2.3.3 Insert Composer
Insert Composer owns highest priority. When it arrives certain time
point, player cuts other composer and display Insert composer. Click ügInsert ügand then choose ügNew ügto set up one new Insert
Composer. Main
difference between Insert Composer and Demand Composer is that user need set
Start & End time and Insert Mode & Insert Times. Player begins to
display Insert Composer in certain assigned start time and ends in stop time.
Insert Mode includes ügAlways ügand ügIntervalüh. If user chooses ügAlwaysüh, insert times or insert time
is not ended and then player cannot display other composers. If user chooses ügIntervalüh, player display Insert
Composer according to insert times in one period of time.
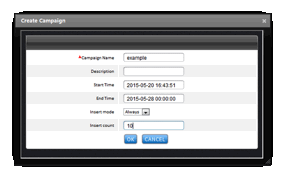
Pic 2.14
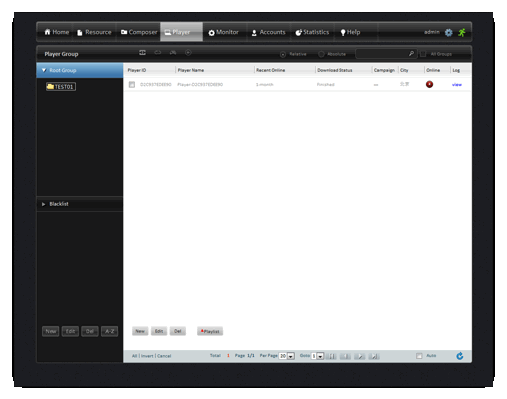
2.4 Player
Player can be grouped. User can set ügNewüh, ügEditüh and ügDeleteüh. Click ügNewüh to set up new group and also go on clicking ügNew ügto set sub group. ügEdit ügcan modify name and location of group.
Choose the player and
grant task Display the players
did not been registered You can choose auto
registered in the dsm8 setting Playerüfs ID ,unique
Download progress Playerüfs location![]()
![]()
![]()
![]()
![]()
Pic 2.15
2.4.1 Auto Register
User sets right server software IP address,
port number and Corp ID for unregistered Player and it is shown online in
server software. Player automatically appears in root directory of Player
Group.
2.4.2 Register by Hand
Choose one group and click ügNew ügto register one Player ID. It must 12 ~ 16 system of Player Mac Address, Player name and etc. Player ID is sole serial number and it is usually called as MAC address ID.
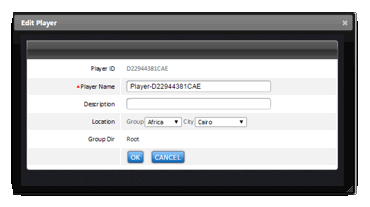
2.4.3 Edit Player
Pic 2.16
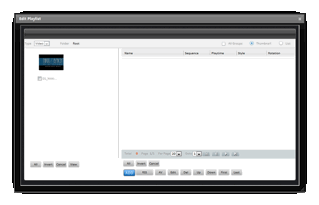
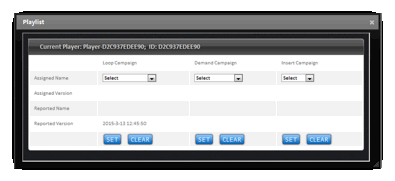
2.4.4 Set Playlist
Click ügPlaylist ügand then choose one certain Loop Composer. Basic unit is based on one composer. Method of setting Demand Composer and Insert Composer is same as Loop Composer.
Pic 2.17
2.5 Monitor
Remote Monitor can format SD card, Player Reboot,
Standby, Wake Up and etc.
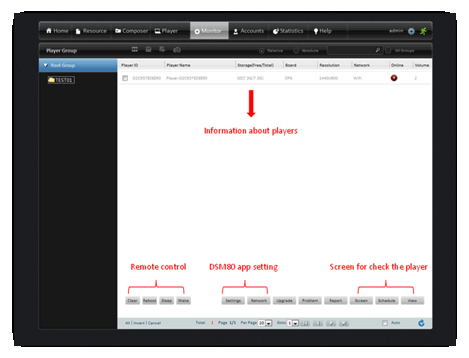
Pic 2.18
2.5.1 Player Setting:
Through ügSettingsüh and ügNetworküh, user can finish general preferences for multiple players remotely
through network.
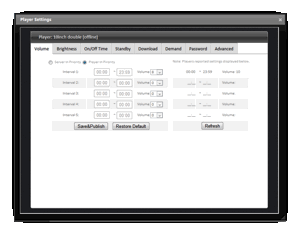
Pic 2.19
2.5.2 Network
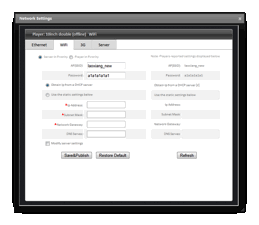
Pic 2.20
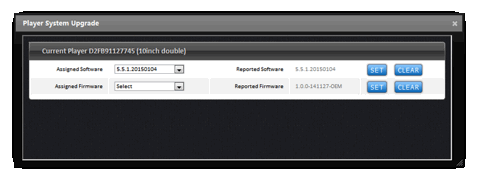
2.5.3 Upgrade
Upgrade: User can upgrade Software, Firmware and Settings and check
version. Upgrade Packages need to be uploaded into server software from
back-stage management.
Notice: It should be very cautious during upgrading process and
please keep player powered on.
Pic 2.21
2.5.4 Problems
ügProblemüh: it can record Playback Abnormal, Time Abnormal, Reboot Abnormal and Power off statues. Playback Abnormal is defined as video playback is not finished in established time period plus another 30 seconds (like playback is dead or frozen). Time Abnormal is defined as time difference between server and player is beyond of five minutes. Reboot Abnormal is defined as reboot times is beyond of specified times (reboot times can be set in setting): Shutdown Abnormal is defined as player comes online or power on in off time period.
Pic 2.22
2.5.5 Report
Pic 2.23
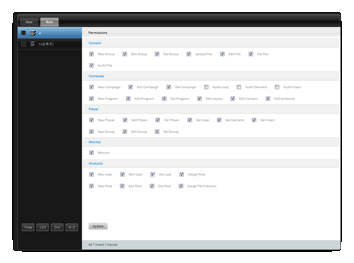
2.6 Accounts
Accounts
include User and Role. Set one Role or multiple ones. Each role can be assigned
operation right. Then set one user or multiple ones and set certain role for
each role.
Set
Role and choose related roles and edit Permissions.
2.6.1 Edit Role
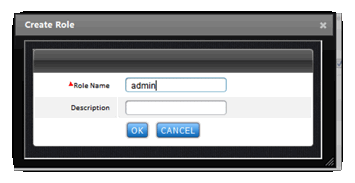
Pic 2.24
Pic 2.25
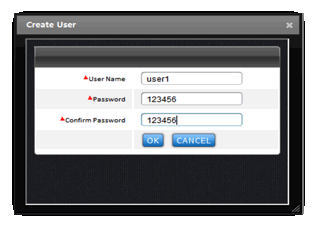
2.6.2 Create User
Pic 2.26
2.6.3 Assign Role
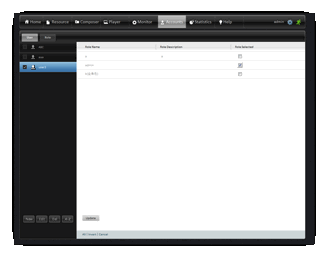
Pic 2.27
Choose related User and Role and then click ügUpdateüh.
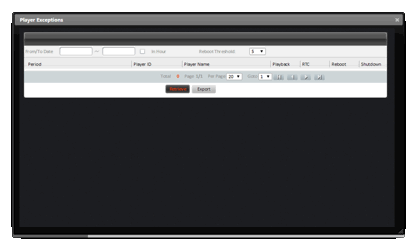
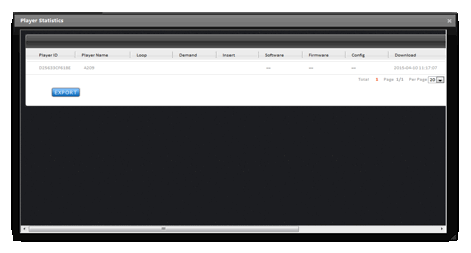
2.7 Statistics
User needs to open Play-log in advanced setting of Player.
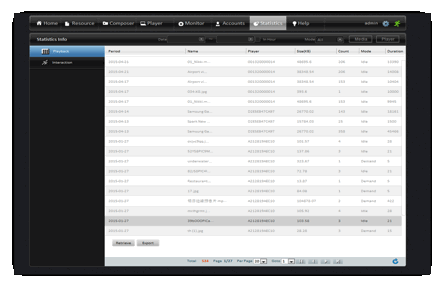
Pic 2.28
3 Back-stage Management
Back-stage Management needs to add admin after IP address: port
number. For example, it is http://server IP address: port number/admin. Default Login Info is that
Username (admin), Password (123456) and Verification Code. Back-stage
Management includes Company, Software, Firmware, Weather, Junk File, User Log
and etc.
Pic 3.1
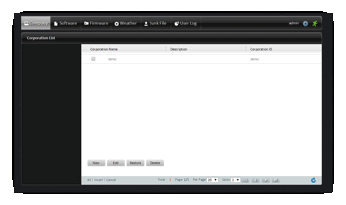
3.1 Company
Default sub account is demo. User can create multiple companies. Every company is totally independent from each other.
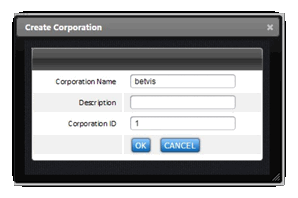
Pic 3.2
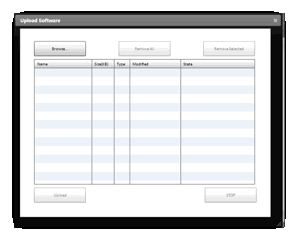
3.2 Software
Here, user can upload Terminal Software Package
(like tar_CEAPP_8900.tenhz). After finish uploading,
user can assign Software Package to certain terminal and remote update software
through network. Notice: Software Package must come from original Supplier. Or
it causes failed upgrade or other accidents. It is
scrupulous to upgrade Software for terminal and forbidden power off during
upgrading process.
Pic 3.3
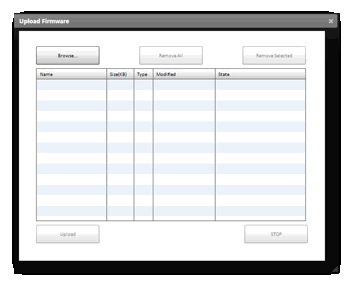
3.3 Firmware
User can uniformly upload Terminal Firmware
Package (like tar_CEROM_8900.tenhz) here. After finish
uploading, user can assign Firmware Package to certain terminal and remote
update software through network. Notice: Firmware Package must come from
original Supplier. Or it causes failed upgrade or other accidents. It is scrupulous to upgrade Firmware for terminal and
forbidden power off during upgrading process.
Pic 3.4
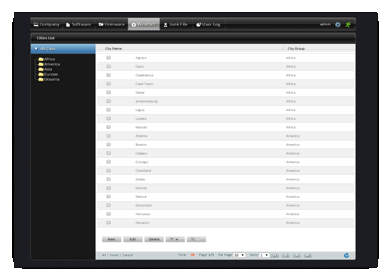
3.4 Weather
Weather Management can automatically get city weather info of latest two days from Yahoo Weather Platform. At same time, it supports add or delete cities and weather info by hand. Notice: It usually needs two hours to finish updating city weather info. If it requires instant updated weather info, please click ügRefreshüh button on bottom of Weather Page.
Pic 3.5
Edit Weather:
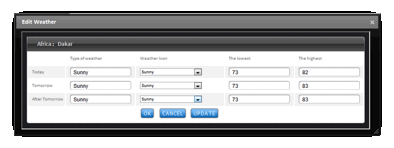
Pic 3.6
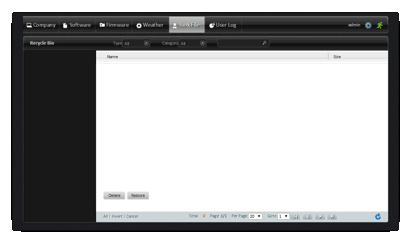
3.5 Junk File
Files which are deleted are temporarily saved in Junk File. User can choose Delete or Restore them. Restore operation will make file be back to root directory of Resources of related Administrative Domain.
Pic 3.7
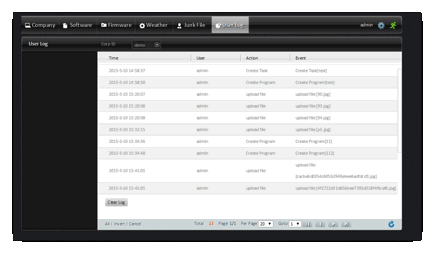
3.6 Statistics
In Statistics, user can check all play-log or delete them all.
Pic 3.8
4 Common Tools
4.1 Standalone Export Software
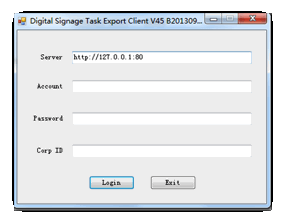
If network is not available for hardware terminals or the player cannot connect to the server, users can use Standalone Export Software to export the playlist into the root directory of the empty USB drive or directly publish to the SD card. Standalone Export Software running environment needs Microsoft .Net Framework 2.0, please install Microsoft .Net Framework 2.0 if it is not in your computer. The installation package names are as follows:
dotNetFx20_Full_x86.exe (32 bit operating system)
dotNetFx20_Full_x64.exe (64 bit operating
system)
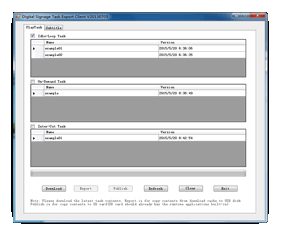
After opening the Standalone Export Software, please input the IP address:download port, user name, password to access into the interface; then select related loop program, demand and insert programs, select the playlist as you want, then click ügdownloadüh, then ügexportüh or ügpublishüh. Playlist will be exported into the USB drive for hardware terminal playing; ügPublishüh means publish the playlist into the SD card of the hardware terminals, and then insert the SD card back to the hardware screen for directly playing.
Note: When directly publish the playlist into SD card, requires SD card has embedded hardware terminal playing program, otherwise it cannot be played; As for updating contents via USB drive, please refer to the related guideline file ügUser Manual for iDS6 Software Running on Hardware terminalüh.
Pic
4.1
Pic
4.2
4.2 Templates Update
iDS6 V5.0 or higher version can support templates management functions, which allows to install and import the embedded templates package, also can support to build new templates based on the embedded templates, in program making users can quote/use the embedded templates or new defined templates. Regarding embedded templates import, please go to START- All Programs-iDS6 Set – Advanced-Update Templates (name for example: iDS6_RES_yyyymmdd.tup), templates files are to be selected from CD sent along with goods, it will warn that update successfully after import finish, which needs 5s-30s to finish import based on the templates file sizes.
Pic
4.3
5 FAQ
5.1 Hardware Terminal Offline
Three necessary conditions make hardware terminals connected to server are as follows:
1, Hardware terminals network, server and configuration should be correct, please refer to ügUser Manual for iDS6 Software Running on Hardware terminalüh to check hardware terminal configuration;
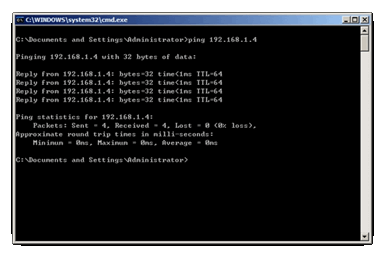
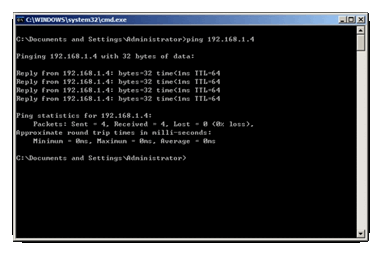
2, The network connectivity of the hardware terminals to the server should be normal, please check if network connectivity of the hardware terminal and server has problem via ping IP address;
3, Make sure all the services of the server can be started normally, and the server website port and control port are not blocked, ports can be checked by telnet.
Example of checking if network connectivity of the hardware terminal and server has problem via ping IP address (assumed hardware terminal IP address is 192.168.1.4, can run the ping operation in the server) as following picture pic 4.4:
Pic
4.4
Pic 4.5
Example of checking the server website port and control port by telnet (Assumed that server IP address is 192.168.1.4. telnet to the server from other computers with same network with server), as shown in the below picture, if all black interface occurred, which means telnet is normal.

Pic
4.6
5.2 Java Plug in Abnormal
Contents uploading, layout and program making are all related to the Java Plug in program, which cannot support the aforementioned software operation if the running environment has no JRE installation or the browser blocked the Java plug in program. For IE browser, users can check if JRE and related Active X are installed and applied by checking the browser interface tool ügInternetüh ühAdvanceüh; For Google Chrome, it will directly warn if install or update the Java Plug in program wen software running.
Contents uploading, layout and program making are all related to the Java Plug in program, which cannot support the aforementioned software operation if the running environment has no JRE installation or the browser blocked the Java plug in program. For IE browser, users can check if JRE and related Active X are installed and applied by checking the browser interface tool ügInternetüh ügAdvanceüh; For Google Chrome, it will directly warn if install or update the Java Plug in program wen software running.
5.3 Flag Plug in Program Installation
V4.3 iDS6 software or higher version has not adopted the Java Plug in program for contents uploading and program making, which adopts flash plug in. Generally, IE and Chrome browsers will automatically install or has embedded Adobe Flash Player. If the computer browser has not installed the Adobe Flash Player, the software operation interface for contents uploading or layout making will be like the follow pictures (a interface with flash mark will show), if the computer is connected to the internet, users can click the flash mark to download and install the Adobe Flash Player, or obtain the offline installation program for manual installation (Note: Adobe flash player installation programs are different for IE and Chrome Browser).
5.4 Browser Compatibility
Since the server website adopted certain pattern and Javascript, so the compatibility issue might be shown under different browsers, it is recommended to use IE 8.0 or above browser or Google Chrome with 21.0 or higher version, it is strongly recommended to use fast and reliable Google Chrome Browser.
5.5 Data Backup
Data should be backup before server software reinstallation or updates. Please stop all services of iDS6 software before data backup (Solution 1: Start - All program - IDSV6, and then select Setup IDSV6, stop all services; Solution 2: Open installation directory admin-tools, go to ServerTool.exe to realize it), or users can directly stop all IDS related services via service manager in computer.
Database file backup needs manually copy the ügmysql-server-5.5.25Ćdataüh under the software installation directory and save it. Then replace the file with same name in newly installed software.
Resources file backup needs manually copy the ügapache-tomcat-6.0.35ĆwebappsĆROOTĆgnamp_worküh and save it. Then replace the file with same name in newly installed software.
Note: Since different versions of software adopts
different mysql-server and apache-tomcat programs, so the numbers in the above
mentioned files might be different, users just need to check the detailed
directory with same prefix.
5.6 Add City Weather
V4.5 iDS6 software or higher version supports Yahoo weather list, if users want to add the city weather that not listed in software, they can manually revise the city configuration files in installation directory to add city weather as he wants (detailed directory prefix needs adjustment):
D:ĆProgram FilesĆiDS6Ćapache-tomcat-6.0.35ĆwebappsĆROOTĆWEB-INFĆclassesĆchinacity.xmlüiChinese version
softwareüjor
globalcity.xmlüiEnglish version softwareüjüB
Firstly, open the yahoo weather website http://weather.yahoo.com, and search the related city name or post code of the city, then click ügsearch weatherüh, it will feedback related city information such as üg1061688üh shown in the following picture.
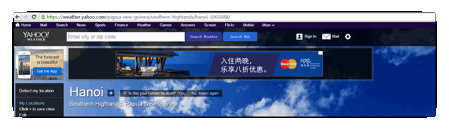
Pic
4.7
Then find the related province in chinacity.xml and then add the related city in it according to the format given.
![]()
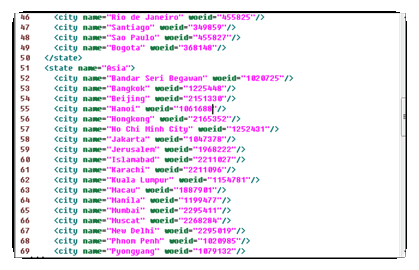
Pic 4.8